How to build a golf simulator enclosure
A custom DIY golf simulator enclosure can be a great addition to any home that allows for indoor practice and play. Building your own enclosure can be a fun and rewarding DIY project, and it can also save you money compared to purchasing a pre-made enclosure. Here are some steps to follow if you want to build your own golf simulator enclosure:

- First, you will need to choose a space in your home that is large enough to accommodate the enclosure. A spare room or garage is often a good choice. The size of your available space will dictate what launch monitor you can user, the best projector that fits your needs and if you can accommodate left or right handed players.
- Second, reference our free E-Book for design examples. We cover how to tackle the design process from start to finish. Don’t just buy a DIY sim in a box, you can build a product that fits your space perfectly, and you will get a higher quality result.
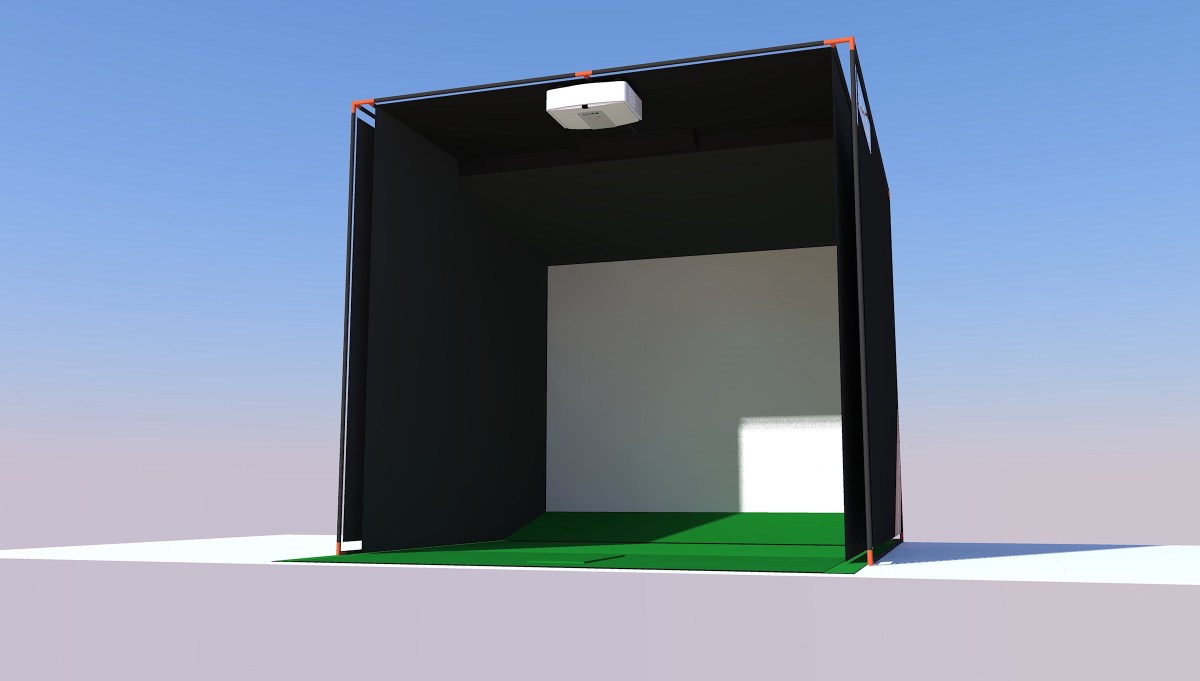
- The dimensions of the frame are critical to accommodate the launch monitor and projector, as well has enough space to swing a golf club freely.
- Next, you will need to gather the materials and tools you will need for the project.
- The most popular framing material is 1″ EMT (electrical metallic tubing) conduit. It is a thin wall metal pipe, traditionally used in construction for electrical conduit.
- To connect the length of tube, you will need 1″ EMT fittings. Tents.com is where I sourced all the fittings to to build my first simulator.
- You will need to source some fabric for the side walls / baffling, as well as the ceiling. I suggest just going to a local fabric store near you.
- Impact Screen – This could be as as expensive as $500-$1000 for a premium screen, so plan accordingly. I have seen some people use a net or a bed sheet to make due, but you really want a nice impact screen that displays a good image quality from your projector.
- Download our E-Book for a breakdown of pricing and all the extra miscellaneous parts you will need.
- Once you have all of your materials, you can begin building the frame for the enclosure. This will typically involve cutting piping to size and using fittings to secure the pieces together.
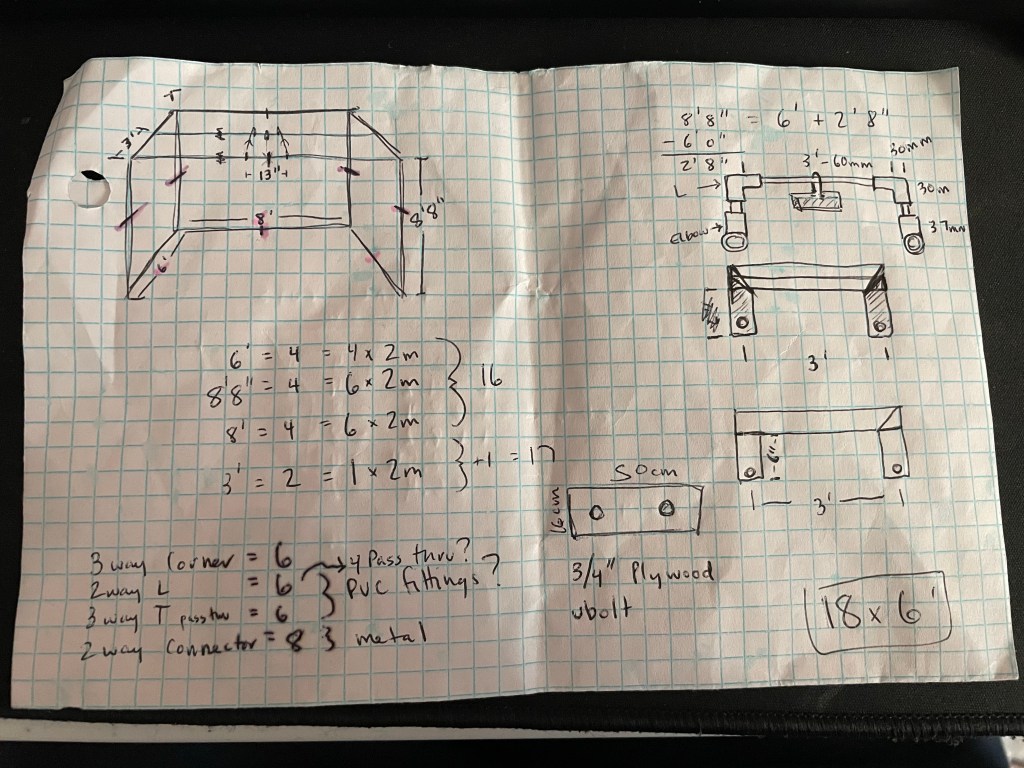
How I designed my first custom golf simulator enclosure.
- Once the frame is complete, you can attach the screen material or netting to the walls of the enclosure. This will typically involve using Velcro or other fasteners to secure the material to the frame.
- Finally, you can add any additional features or accessories to the enclosure, such as golf club racks or lights. You may also want to add padding or other protective materials to the walls to reduce the risk of damage to your golf clubs or balls.
Overall, building a golf simulator enclosure is a relatively straightforward DIY project that can be completed in a few days with the right materials and tools. Just be sure to plan ahead and carefully follow the steps outlined above to ensure a successful outcome.
